今回はJetsonNanoにdarknet(AlexeyAB)を入れて物体検出する方法を紹介します。
参考記事
今回はこちらの記事の内容を参考にしています。
【物体検出】vol.2 :YOLOv3をNVIDIA Jetson Nanoで動かす
実行するときの各パラメータについてはこちらの記事が非常に参考になります。
Yolo-v4 and Yolo-v3/v2 for Windows and Linux
darknet(AlexeyAB)のインストール
今回はホームディレクトリの下にyoloABというフォルダを作成し、この中にdarknet(AlexeyAB)をクローンします。
|
1 2 3 4 |
mkdir yoloAB/ cd yoloAB/ git clone https://github.com/AlexeyAB/darknet darknet cd darknet |
~/darknetの下に必要なモデルをダウンロードしておきます。
|
1 2 |
wget http://pjreddie.com/media/files/yolov3-tiny.weights wget http://pjreddie.com/media/files/yolov3.weights |
Makefileを適当なエディタで開きます。
|
1 |
nano /home/jetbot/yoloAB/darknet/Makefile |
Makefileを以下のように編集して保存します。
|
1 2 3 4 5 6 7 8 9 10 11 12 13 14 15 16 17 18 |
GPU=1 CUDNN=1 CUDNN_HALF=0 OPENCV=1 AVX=0 OPENMP=0 LIBSO=1 ZED_CAMERA=0 ZED_CAMERA_v2_8=0 ARCH= -gencode arch=compute_30,code=sm_30 \ -gencode arch=compute_35,code=sm_35 \ -gencode arch=compute_50,code=[sm_50,compute_50] \ -gencode arch=compute_52,code=[sm_52,compute_52] \ # -gencode arch=compute_61,code=[sm_61,compute_61] # For Jetson TX1, Tegra X1, DRIVE CX, DRIVE PX - uncomment: ARCH= -gencode arch=compute_53,code=[sm_53,compute_53] |
.bashにnvccのPATHを設定する
|
1 2 |
export PATH=/usr/local/cuda/bin:${PATH} export LD_LIBRARY_PATH=/usr/local/cuda/lib64:${LD_LIBRARY_PATH} |
ビルドを実行
makeでビルドを実行します。
|
1 |
make |
ビルドが完了したら以下を入力して
usage: darknet
のように表示されることを確認します。
|
1 |
./darknet |
YOLOの物体検出を行う
今回インストールしたdarknetで物体検出を行う場合、それぞれ以下のようにして実行することができます。
静止画の物体検出を行う
カレントディレクトリを~/darknetに移動しておきます。
|
1 |
cd yoloAB/darknet |
静止画の物体検出を行いたい場合はこちらを実行する。
|
1 |
./darknet detector test cfg/coco.data cfg/yolov3.cfg yolov3.weights data/dog.jpg |
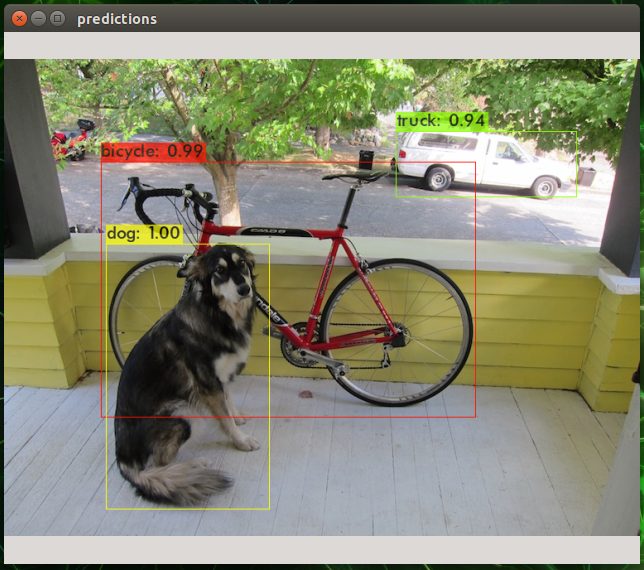
物体検出の結果は「predictions.jpg」として保存されます。
~/darknetフォルダに格納されているdarknet_images.pyを利用する場合は以下のように入力して実行する。
|
1 |
python darknet_images.py --input data/dog.jpg |
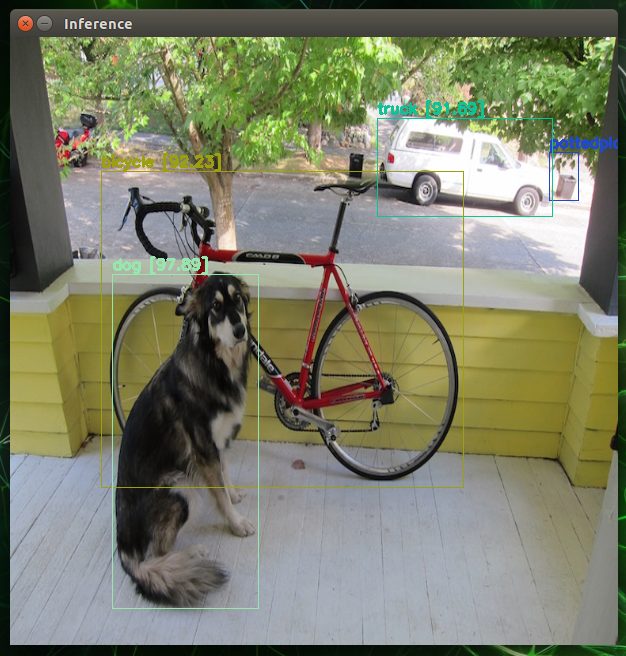
こちらは処理の途中で画像をリサイズしているので縦横比が若干違ってると思います。
デフォルトではyolov4の設定が読み込まれますので、他のモデルで物体検出したい場合は以下のようにパラメータを設定します。
|
1 |
python darknet_images.py --config_file ./cfg/yolov3.cfg --weights yolov3.weights --input data/dog.jpg |
WEBカメラのリアルタイム物体検出を行う
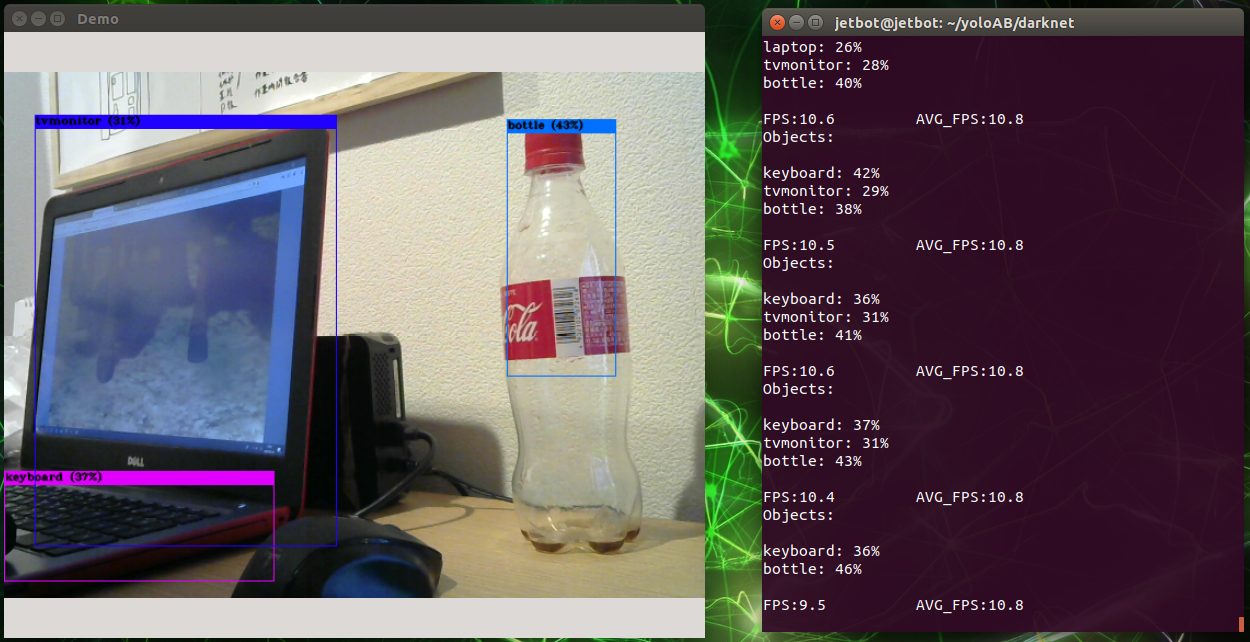
WEBカメラを接続してリアルタイム物体検出を行いたい場合はこちらを実行する。WEBカメラがデバイス1で認識されている場合は「-c 1」に変更して実行する。
|
1 |
./darknet detector demo cfg/coco.data cfg/yolov3-tiny.cfg yolov3-tiny.weights -c 0 |
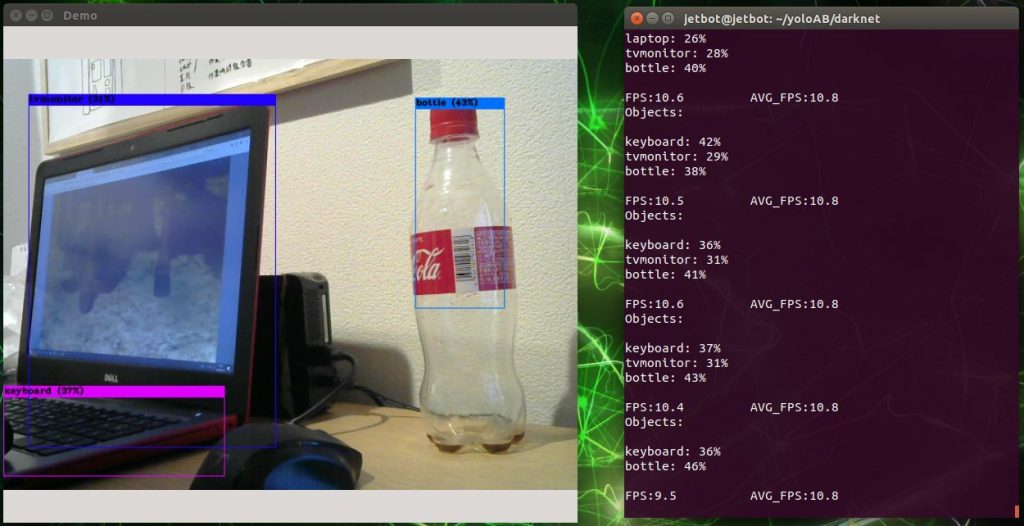
かなり重たくなりますが、yolov3を実行する場合はこちらを実行します。
|
1 |
./darknet detector demo cfg/coco.data cfg/yolov3.cfg yolov3.weights -c 0 |
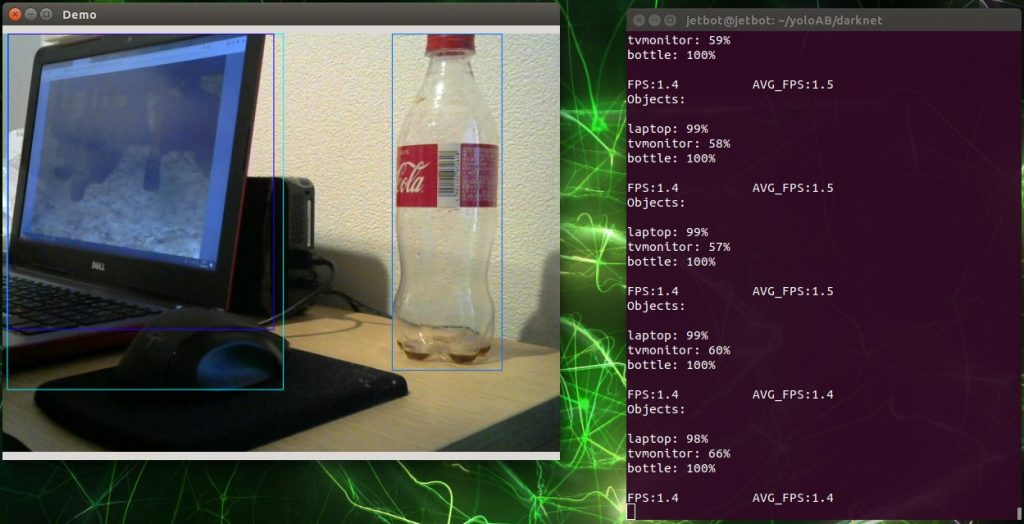
さらに最新のyolov4を実行する場合はこちらを実行します。
|
1 |
./darknet detector demo cfg/coco.data cfg/yolov4.cfg yolov4.weights -c 0 |
darknet_video.pyを利用する場合
darknet_video.pyもそのまま利用したかったのですが、私の環境では動かすことができませんでしたので内容を以下のように編集しました。
|
1 2 3 4 5 6 7 8 9 10 11 12 13 14 15 16 17 18 19 20 21 22 23 24 25 26 27 28 29 30 31 32 33 34 35 36 37 38 39 40 41 42 43 44 45 46 47 48 49 50 51 52 53 54 55 56 57 58 59 60 61 62 63 64 65 66 67 68 69 70 71 72 73 74 75 76 77 78 79 80 81 82 83 84 85 86 87 88 89 90 91 92 93 94 95 96 97 98 99 100 101 102 103 104 105 106 107 108 109 110 111 112 113 114 115 116 117 118 119 120 121 122 123 124 125 126 127 128 129 130 131 132 133 134 135 136 137 138 |
import argparse import os import glob import random import darknet import time import cv2 import numpy as np import darknet def parser(): parser = argparse.ArgumentParser(description="YOLO Object Detection") parser.add_argument("--input", type=str, default=0, help="video source. If empty, uses webcam 0 stream") parser.add_argument("--out_filename", type=str, default="", help="inference video name. Not saved if empty") parser.add_argument("--weights", default="yolov4.weights", help="yolo weights path") parser.add_argument("--dont_show", action='store_true', help="windown inference display. For headless systems") parser.add_argument("--ext_output", action='store_true', help="display bbox coordinates of detected objects") parser.add_argument("--config_file", default="./cfg/yolov4.cfg", help="path to config file") parser.add_argument("--data_file", default="./cfg/coco.data", help="path to data file") parser.add_argument("--thresh", type=float, default=.25, help="remove detections with confidence below this value") return parser.parse_args() def str2int(video_path): """ argparse returns and string althout webcam uses int (0, 1 ...) Cast to int if needed """ try: return int(video_path) except ValueError: return video_path def check_arguments_errors(args): assert 0 < args.thresh < 1, "Threshold should be a float between zero and one (non-inclusive)" if not os.path.exists(args.config_file): raise(ValueError("Invalid config path {}".format(os.path.abspath(args.config_file)))) if not os.path.exists(args.weights): raise(ValueError("Invalid weight path {}".format(os.path.abspath(args.weights)))) if not os.path.exists(args.data_file): raise(ValueError("Invalid data file path {}".format(os.path.abspath(args.data_file)))) if str2int(args.input) == str and not os.path.exists(args.input): raise(ValueError("Invalid video path {}".format(os.path.abspath(args.input)))) def set_saved_video(input_video, output_video, size): fourcc = cv2.VideoWriter_fourcc('m', 'p', '4', 'v') # fourcc = cv2.VideoWriter_fourcc(*"MJPG") fps = int(input_video.get(cv2.CAP_PROP_FPS)) video = cv2.VideoWriter(output_video, fourcc, fps, size) return video def image_detection(image, network, class_names, class_colors, thresh, width, height): image_rgb = cv2.cvtColor(image, cv2.COLOR_BGR2RGB) image_resized = cv2.resize(image_rgb, (width, height), interpolation=cv2.INTER_LINEAR) darknet.copy_image_from_bytes(darknet_image, image_resized.tobytes()) detections = darknet.detect_image(network, class_names, darknet_image, thresh=thresh) image = darknet.draw_boxes(detections, image_resized, class_colors) return cv2.cvtColor(image, cv2.COLOR_BGR2RGB), detections def video_cap(): random.seed(3) # deterministic bbox colors video = set_saved_video(cap, args.out_filename, (width, height)) capflag = True start_time = time.time() while capflag: #print("Start") end_time = time.time() fps = 1/(end_time - start_time) start_time = end_time print("FPS: {}".format(fps)) ret, frame = cap.read() if not ret: break image, detections = image_detection( frame, network, class_names, class_colors, args.thresh, width, height ) darknet.print_detections(detections, args.ext_output) try: # if frame_resized is not None: if image is not None: print("video.write") video.write(image) print("cv2.imshow") cv2.imshow('Inference', image) if cv2.waitKey(1) & 0xFF == ord('q'): print("push q") capflag = False break except: print("except break") capflag = False break cap.release() video.release() cv2.destroyAllWindows() if __name__ == '__main__': args = parser() check_arguments_errors(args) network, class_names, class_colors = darknet.load_network( args.config_file, args.data_file, args.weights, batch_size=1 ) width = darknet.network_width(network) height = darknet.network_height(network) darknet_image = darknet.make_image(width, height, 3) input_path = str2int(args.input) cap = cv2.VideoCapture(input_path) print("video_cap start") video_cap() cap.release() cv2.destroyAllWindows() |
~/darknetフォルダに格納されているdarknet_video.pyを利用する場合は以下のように入力して実行する。
|
1 |
python darknet_video.py |
こちらは処理の途中で画像をリサイズしているので縦横比が若干違って表示されます。
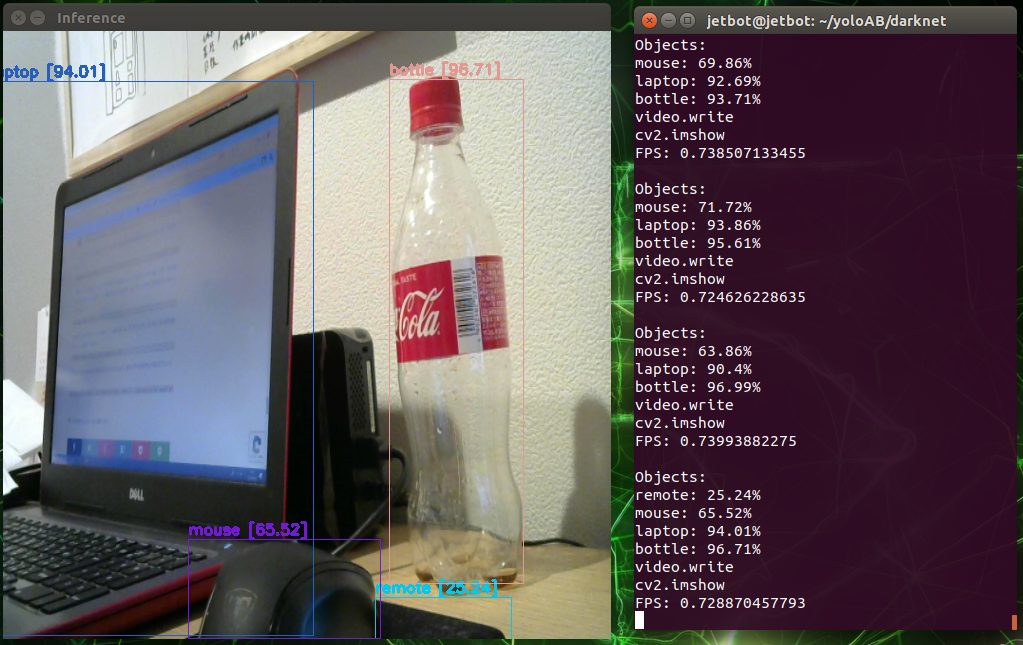
デバイス1番に接続しているカメラを利用する場合はパラメータで以下のように指定します。何も指定しない場合はデバイス0番のカメラ映像が読み込まれます。「q」ボタンを押すと処理を終了させることができます。
|
1 |
python darknet_video.py --input 1 |
物体検出の結果を動画ファイルに保存したい場合は以下のように実行します。何も指定しない場合は動画ファイルが保存されません。
|
1 |
python3 darknet_video.py --out_filename outflie.mp4 |
デフォルトではyolov4の設定が読み込まれて実行されます。他のモデルを利用するときは以下のように指定します。
|
1 |
python darknet_video.py --out_filename outflie.mp4 --config_file ./cfg/yolov3-tiny.cfg --weights yolov3-tiny.weights |
以上、今回はJetsonNanoにdarknet(AlexeyAB)を入れて物体検出する方法を紹介について紹介させていただきました。


[…] Kazuki Room ~ モノづくりブログ … JetsonNanoにdarknet(AlexeyAB)を入れて物体検出する方法 […]